
I do not pretend to be a crafting expert by any stretch of the imagination, but I do like to expand my horizons and be creative. If you have spent any time on Pinterest you will know there are a plethora of amazing ideas on everything under the sun. Sometimes they are so elaborate and impossible for the amateur you end up feeling inadequate. Other times it is actually quite simple to create something both cute and easy.
Halloween is one of my favorite holidays and a few years ago I began looking for a craft that my inexperienced hands could attempt. I found this and it became my inspiration.

With the inspiration in hand, I simply needed my supplies. And although I made this a few years back these are available every year. And not only that, this is an affordable craft to make. Here is what you need:
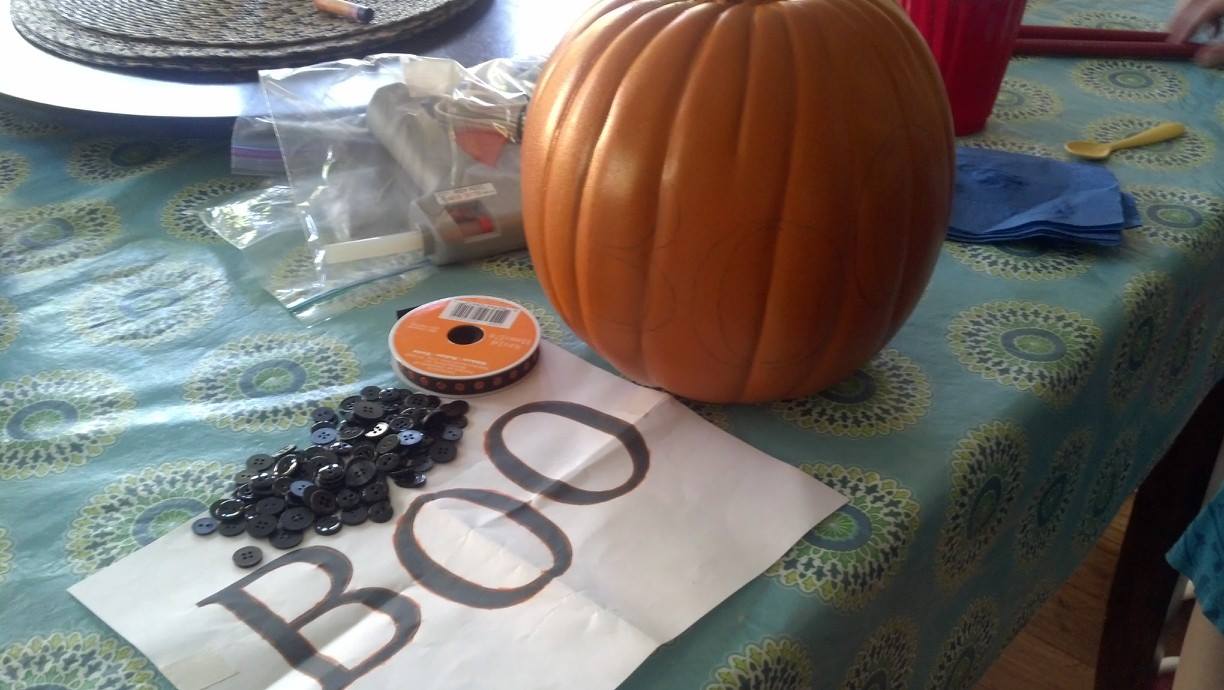
1 plastic pumpkin, available at Micheal’s Craft store ($24.99 but on sale currently for 50% off)
1 bag of black buttons, assorted sizes available at Joann’s Fabrics ($2.29) (x)
1 spool of thin ribbon (I chose black with orange polka dots) available at Michael’s ($2.99)
Hot Glue Gun
Tweezers
Masking Tape
Pencil
Printed out design or saying of your choosing
To create your pumpkin start by either drawing or printing out a design or saying of your choice. If you are not an expert like me, I would go with something simple like I did with “Boo.” On the back of the paper use a pencil to cover the letters like you are coloring them in. This will allow you to easily trace the design on the pumpkin. Next position the paper where you desire onto the pumpkin and hold it in place with masking tape. Using the same pencil, draw over the letters. This will lightly put the design onto the pumpkin. Remove the paper and go over the letters again by hand so you can clearly see it. Erase any excess pencil lead. If you trust yourself to draw it free hand on the pumpkin, you can skip these steps altogether. If you can, bravo to you. Here is what it should look like before you begin (for now ignore the buttons already in place)
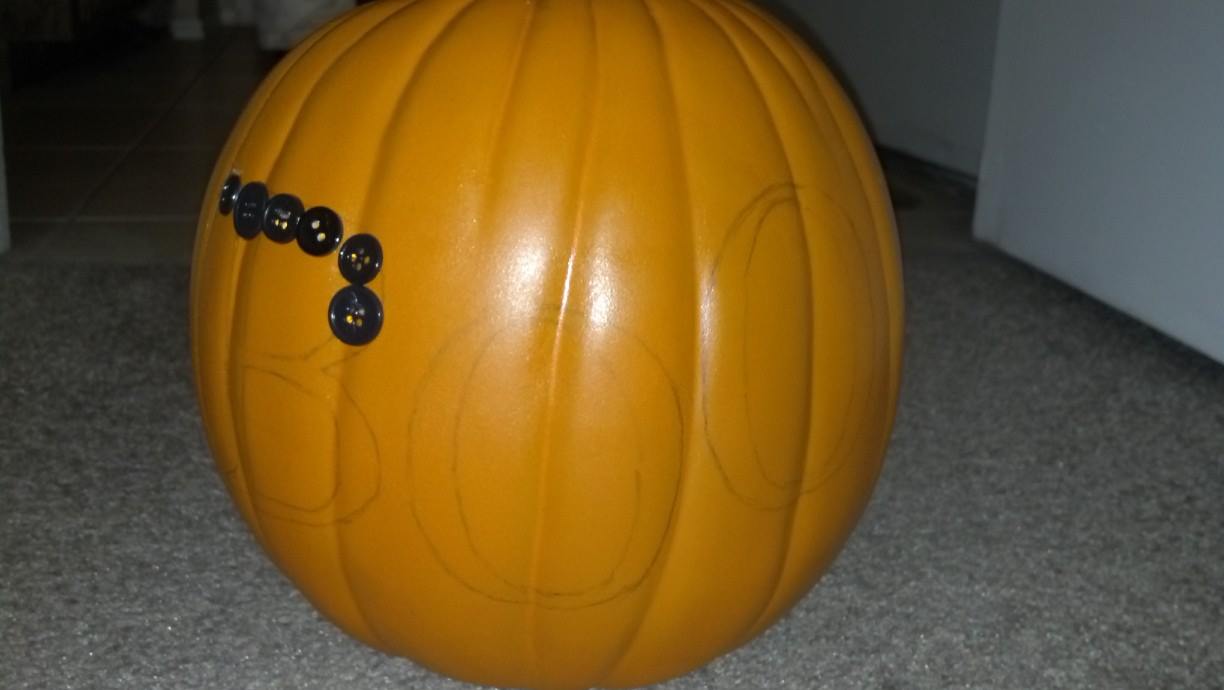
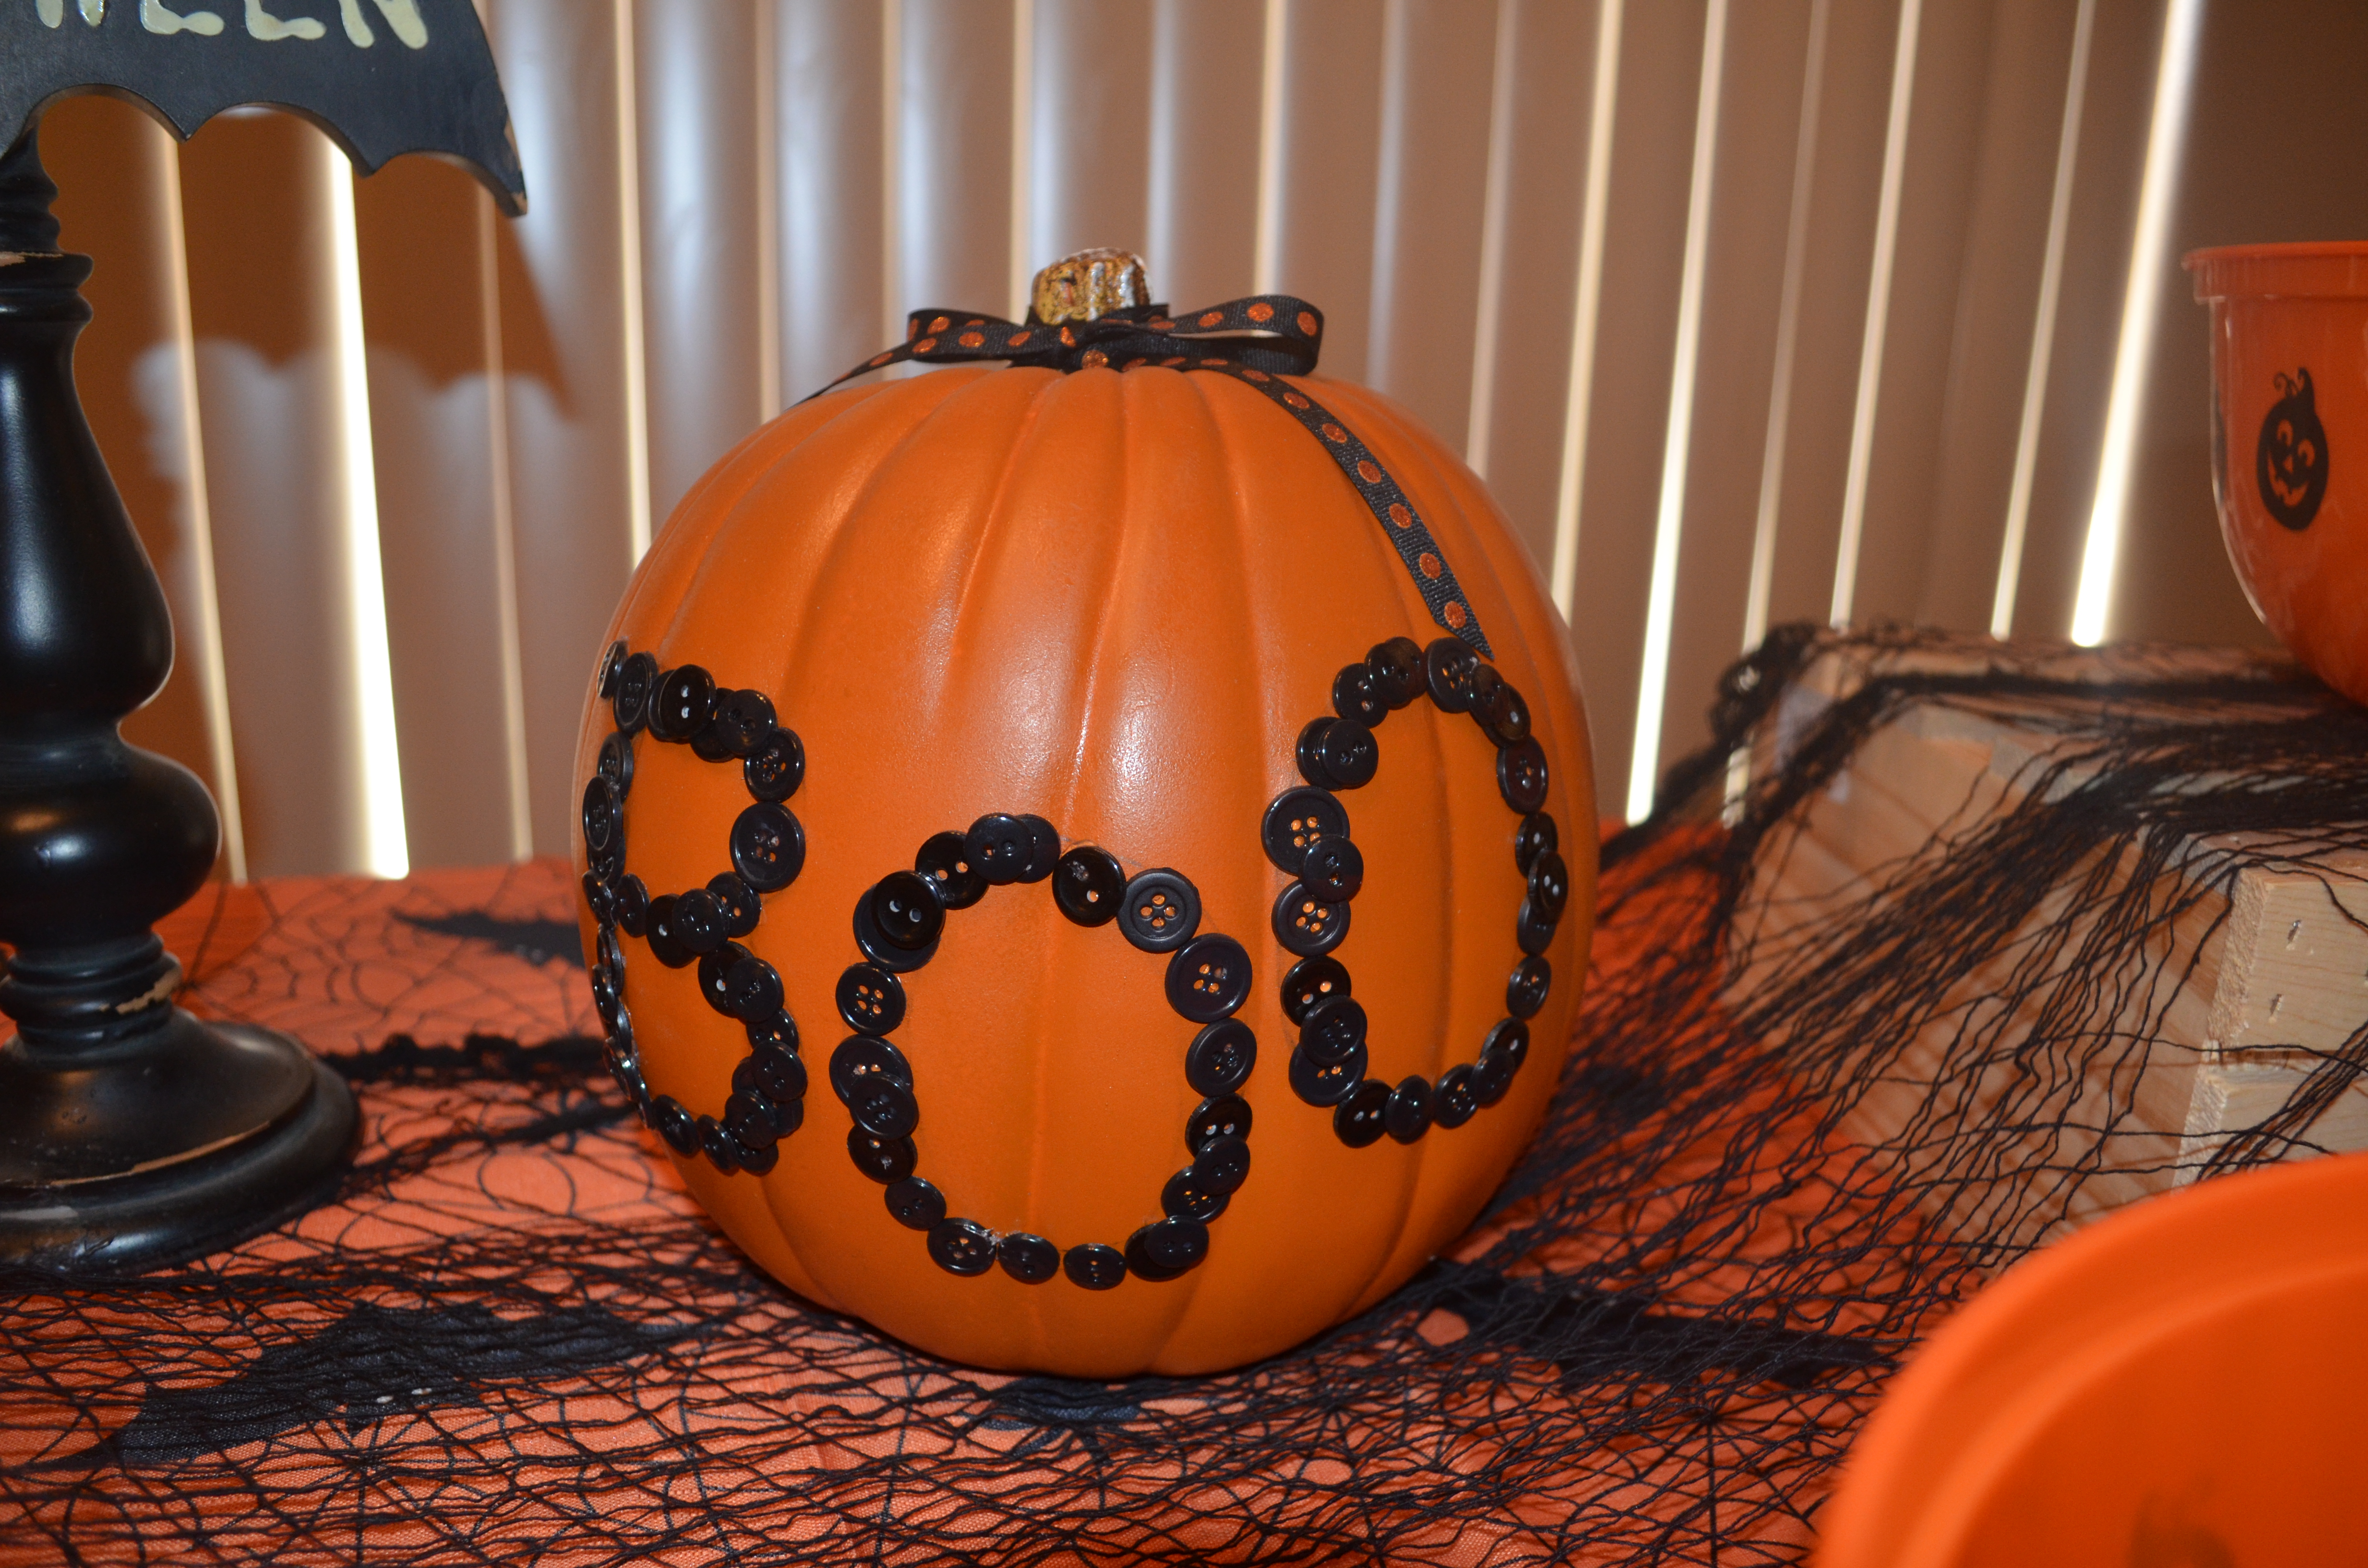
The next part has no rhyme or reason, you can place the buttons and choose which sizes any way you wish. But remember that you should not hold the buttons in your hand. The glue will end up burning your fingers if it touches them which is very likely. I learned that the hard way Yikes!! Instead, use the tweezers to hold each button and place a small dab of glue on each before placing it onto the pumpkin. You can use the pencil to push the button firmly in place, Just do so quickly before he glue dries. Continue going over each letter and then overlap buttons to fill in gaps and make it look pretty!! Lastly, cut a pieces of ribbon and toe it to the stem of the pumpkin. I would also add a little glue to the inside of the ribbon once tied to hold it in place. And voilà you are done!! Believe me if I can do this, you can. It is a super cute, easy and fun craft and one you can make part of your Halloween decor for years to come.
Here is my finished product!!

Now go and and get your craft on and above all Have Fun!!

Good reading tthis post
LikeLike